Pedals Week 2026: If you’ve ever wondered what MIDI can do for your guitar rig, this is the guide you’ve been looking for. MIDI isn’t just for synth nerds. It can add incredible flexibility to your setup, particularly for live players looking to cut down on tap dancing. It can also get you the kind of seamless tone changes normally reserved for pro touring players.
In this guide, I’ll take you through everything you need to know about MIDI, the hardware and connectivity you’ll need, and some examples of how to get it set up on your own rig. It might take an afternoon to get your head around, but once that’s done, you’ll unlock some seriously cool functionality from your pedals.
What is MIDI?
Let’s get one thing straight: MIDI isn’t audio. MIDI stands for Musical Instrument Digital Interface, and at its core, it is a communication protocol for sending signals from one piece of hardware to another. For guitarists, this means you can send a signal that changes a preset on your multi-effects pedal, or even just changes a single setting, like turning up the gain on an overdrive pedal, or adjusting individual EQ knobs.

Back in the ’80s, synth players were growing frustrated at having loads of gear that couldn’t talk to each other. If you bought a synth from Roland, it wouldn’t work with one from Oberheim or Sequential. Ikutaro Kakehashi, then president of Roland, recognized that this issue was limiting the growth of the electronic musical instrument industry, and together with Dave Smith from Sequential, came up with a standard protocol that would allow universal communication. Thus, MIDI was born.
MIDI sequencing enabled musicians with no formal training to create complex arrangements, making music creation far more accessible to the masses. It also allowed a smaller group of musicians to sound like a much bigger group, revolutionizing live performances.
MIDI also coincided with another significant tech development: the personal computer. The combination of MIDI and PCs meant that home recording became far more accessible for your average Joe, without having to use expensive studio equipment.
MIDI & guitars

MIDI had two large effects on the world of guitar. The first camp was those who wanted to turn the guitar into a synthesizer. Suddenly, you could make your guitar sound like a violin or a lush pad on a synthesizer. Players like Allan Holdsworth, Pat Metheny, and Jerry Garcia utilized these to varying degrees, producing some pretty wild effects and some absolutely crazy-looking guitars.
All the latest guitar news, interviews, lessons, reviews, deals and more, direct to your inbox!
Using pitch to MIDI, you could now send the dynamic signal of an electric guitar, convert it to 1s and 0s, and send it on to a synthesizer to completely transform the sound. This required a hexaphonic pickup, which tracked each string individually in order to prevent the computer from getting confused by so many incoming signals.

The other camp, and the one that is more relevant to today’s guitarist, is the rig controllers. Players like The Edge needed a way to manage their ginormous setups with multiple amps, pedals, and rackmount gear more easily, and MIDI systems provided a way to do that.
MIDI foot controllers allowed them to change multiple parameters at once, switching amp tones and multiple patch settings on their rack gear seamlessly, without having to bend down and turn knobs or have someone backstage do the changes manually. It completely revolutionized what guitarists were able to do onstage when it came to controlling masses of effects.
MIDI protocol

How does MIDI actually work? Let’s break it down. There are two main types of MIDI communication:
- Control Change (CC): This is typically used for parameter changes within a preset. For example, turning up the delay time on a delay pedal.
- Program Change (PC): This is used for wider changes like switching to a completely different preset on a multi-effects pedal.
When you send a MIDI CC signal from a foot controller to your hardware, you’ll be sending what’s called a three-byte package. For MIDI PC signals, it only uses the first two bytes to send a signal.
For guitarists, the three-byte package will look something like this:
- Byte 1: The type of message it is and what channel it’s on. For example, “this is a Control Change (CC) message, sending on channel 4.” This means anything not on channel 4 will ignore the message. With a MIDI controller, you get a total of 16 channels to send signals over.
- Byte 2: Each knob, switch, or function on a guitar pedal will have a MIDI CC number assigned, from 0 to 127. Byte 2 will send a MIDI CC number from the foot controller to engage that particular knob, switch, or function. In this example, we want to change the mix knob of our delay pedal, which might be CC number 15.
- Byte 3: This is the value you want to change the parameter to. This also operates the MIDI CC from 0 to 127, so sticking with our delay pedal example, 0 would be the mix knob all the way down, and 127 would be the mix knob all the way up. You can then set this to whatever level you like, adding in more of your delayed sound for a particular section of your song.
As you’re able to send 16 channels with a potential 128 parameters, that totals to 2,048 individual parameters. It means there’s basically no chance of running out of room to send signals in a MIDI system. If you’ve got that many knobs or switches on your pedalboard, please send me a picture!
MIDI hardware
Now you understand how MIDI works and what it does, let’s look at which hardware you can use with MIDI as a guitar player.

The most common use of MIDI by guitar players is the MIDI foot controller. These are pedals with a variety of footswitches, and they usually have a screen so you can see what bank/patch you’re on or which function you’re triggering.
Multi-effects pedal

Many multi-effects pedals also have MIDI already built into them. Units like the Quad Cortex or Helix Stadium can be configured to send MIDI data via their footswitches, so you can control external pedals or hardware whilst using them for your main amp tone.
MIDI receivers
You also need somewhere to send your MIDI data, and there are a few common bits of hardware that you can control with MIDI.
Digital pedals

The most common for guitar players would be a digital effects pedal. Things like reverbs, delays, and modulation pedals are the most typical recipients of MIDI signals.
Guitar amps

Modern guitar amps also often have MIDI ports, which allow you to use a MIDI controller to change the channels. So you could use your multi-effects pedal with a guitar amp, and get that to change the amp channel from clean to dirty at the same time as engaging your delay pedal, and upping the mix knob to 50%.
Laptops

A more modern way to use MIDI is by sending the data to a laptop. This might be to use a guitar plugin live, with the MIDI controller to change presets or parameters. More often, though, especially for big touring bands, they’re using MIDI automation via backing tracks.
In this example, there’s a Digital Audio Workstation (DAW) running on a laptop, and all the changes to the amp and pedals are preprogrammed via MIDI. The backing tracks play, and when the band moves to a new section, for example, going from a big chorus to a clean middle eight, the MIDI track sends the changes to their gear, resulting in a seamless switching of tone.
This is what allows big bands like Muse to put on an amazing live show, running around the stage without having to worry about getting back in time to stomp on their pedals to change their settings for a chorus section or a guitar solo. Obviously, this can go wrong, so most pro bands use two laptops running in unison in case the first one fails.
MIDI connections
You might already have some MIDI-enabled gear, so what should you look for to start setting up your own MIDI rig?
5-pin DIN

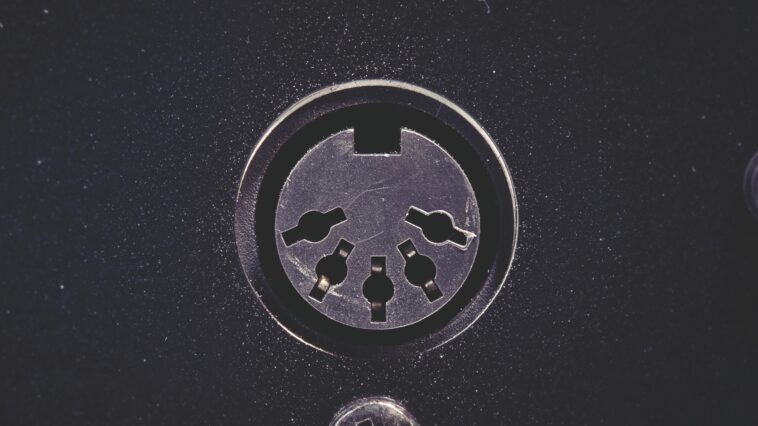
This is the classic MIDI connection that’s been in use since the ’80s. It’s a round connector with 5 pins, and these are universal, allowing any gear with the same connections to interact with one another.
TRS MIDI

5-pin DIN connections are quite large, which means you’re only likely to find them on bigger pedals like multi-effects or Strymon workstation pedals. So, TRS (Tip Ring Sleeve) MIDI was born, enabling MIDI functionality using a 1/4-inch or 1/8-inch jack, which it makes it much more usable on compact pedals.
Unfortunately, unlike in the ’80s when companies all agreed on a single format, TRS MIDI varies in its functionality depending on which cable you use. The cables look identical on the outside, but are wired differently on the inside depending on what the manufacturer wants them to do.
- TRS MIDI Type A: This is the most common type of TRS MIDI cable, used by Strymon, Boss, Line 6, Meris, and many others. These are wired so that the Tip sends the data and the Ring sends the power. Note that the power isn’t to power pedals, but rather a small voltage required to send the MIDI data.
- TRS MIDI Type B: It’s unlikely you’ll encounter this as a guitarist, but it’s worth knowing about. Type-B cables are often used by synths and MIDI controllers, and here the data is sent down the Ring with the power down the Tip, so if you tried to use this cable with a modern pedal, it won’t work. It just means you need to be careful when buying TRS MIDI cables that you’re getting a Type A rather than a Type B.
- Chase Bliss: On Chase Bliss pedals, neither Type A nor Type B MIDI cables will work. CB uses a specific wiring where the MIDI data is sent down the Ring, but the Tip is disconnected. This is because Chase Bliss MIDI ports need to act as both MIDI inputs and expression pedal inputs. If you have a Chase Bliss pedal, then you need to buy their specific cable or use a MIDI utility/splitter box that translates the signal for you.
MIDI In/Out/Thru

Confused yet? Just wait, there’s more. Many pedals using the 5-pin DIN system will have a separate MIDI In connector, as well as a MIDI Out and/or Thru. Your MIDI footcontroller might only have a single MIDI Out, so if you want to chain multiple MIDI pedals together, you’ll need to go out from your controller, to the In of your pedal, then use the Out or Thru to go to the next pedal’s MIDI In, and so on and so forth.
The hole goes even deeper as we start to get into TRS MIDI. On some pedals, manufacturers use two 1/8-inch jacks side by side to act as the In and Out/Thru. You might need to dive into your pedal settings to get this to work properly, as by default the Out will need to be reconfigured as a Thru.
You might notice that some of your pedals only feature a single TRS MIDI connector. In this instance, you can’t daisy chain them and instead need to buy an additional MIDI splitter box, which acts as the main hub for all your MIDI pedals. A typical setup would be to run a master 5-pin DIN from your MIDI foot controller to your MIDI splitter box, then send out from here to each individual pedal with a single TRS MIDI connector.
Other MIDI uses
MIDI can do more than just change pedal settings, so here’s some extra functionality you can unlock.
MIDI clock
Syncing your delay and modulation effects with the song’s tempo will make your songs sound a lot more professional, and a MIDI controller can do this automatically. A MIDI clock can be sent by a controller or a DAW and will automatically synchronize all of the pedals in the MIDI ecosystem to the same tempo. This means your delay repeats or tremolo pedals will be exactly in time with the beat.
Don’t worry if you don’t play with a DAW; most MIDI foot controllers also allow you to set a global tap tempo. That way, when your drummer inevitably speeds up the song, you can still make sure all of your pedals are synchronized to the tempo of the track when playing without a click.
MIDI expression

A lot of MIDI foot controllers have a dedicated expression pedal input. Traditionally, an expression pedal controls a single or two functions, so you’d need to get two pedals to control more than one or two pieces of gear. With a MIDI controller, however, you can digitally alter which parameter you want the expression pedal to control.
For example, on the first song of your set list, it can be set to do a traditional wah effect, on the second song it will seamlessly control the time knob on your delay pedal, and so on. You can even program it to change multiple parameters at once, which can unlock some wild sounds you wouldn’t be able to achieve without a MIDI controller.
Common issues

If you’re setting a MIDI rig up for the first time, here’s a few cautionary tales from other players so you can learn from their mistakes.
Omni Mode
Many pedals come set to Omni mode by default, which means they’re listening to all 16 MIDI channels at once. If you chain a couple of pedals together without specifying a channel for them to communicate, you’ll likely find that both pedals change presets at the same time.
To counter this, make sure to find the MIDI channel settings for each pedal and give them their own channel number to communicate over.
MIDI loops
Connecting the MIDI Out of the foot controller to the MIDI In of the pedal is the right way to use MIDI functionality. Many beginners, however, then end up going back from the MIDI Out of the pedal to the MIDI In of the foot controller. This is logical to a guitarist because we’re used to plugging in guitar pedals in this way.
This doesn’t work with MIDI because when communicating with MIDI, we want a one-way stream. If you connect them in this way, you’ll get a feedback loop where the foot controller sends messages to the pedal, which sends back to the controller, which then passes it back on to the pedal, resulting in crashes or freezes.
The only time you would be likely to use both the MIDI ports on your controller is when integrating a rack processor like the Kemper or Axe-Fx. Here you might want to send data like the tuner from the rack unit to make it visible on your controller, or to align preset names so you know which song setting you’re on. This requires a more advanced setup to enable bi-directional communication between the two without getting the feedback loop.
Cable compatibility
I mentioned it earlier, but cable compatibility is one of the biggest issues guitarists run into. When you type ‘TRS MIDI cable’ into Amazon, it’s not always clear which one you’re getting. Make sure you check the specifications or title so that you’re getting a Type-A cable, as Type-B cables typically don’t work with guitar gear.
MIDI 2.0

You may have heard of MIDI 2.0, and for now it’s primarily within the realm of synthesizers and DAWs. It’s worth mentioning here however as eventually it will become the norm for guitarists with pedalboards.
As I mentioned before, MIDI communication typically works as a one-way street. With MIDI 2.0, bidirectional communication becomes much easier. This means that in the future, you can plug a MIDI controller into a guitar pedal, and it will automatically know things like CC maps and preset names, so you won’t have to program them in manually.
MIDI currently works with the 0 to 127 parameters, so for some effects with really fine control, you might notice small ‘steps’ as it ramps up. This is sometimes called ‘zipper noise’. MIDI 2.0 has 32-bit resolution, so zipper noise disappears as there are billions of steps in MIDI 2.0.
MIDI 2.0 also features up to 256 channels, which, while it isn’t that useful for guitar players, can open up more options for big bands running super-complex MIDI setups. If you’ve got a single laptop running a huge group of musicians, you won’t be limited by MIDI channels any longer.
Finally, MIDI 2.0 is backwards compatible, so it will recognize MIDI 1.0 devices automatically. It means all the MIDI gear we have now won’t suddenly become obsolete when the music industry moves to MIDI 2.0 at a larger scale.
Conclusion
Still with me and excited by the possibilities of MIDI now? Well, my advice would be to start small first. Use one controller for one pedal, changing one parameter. MIDI can be a real minefield when you start introducing multiple components, so starting small will save you a lot of headaches in the long run.
Once you’ve got one thing working, you can build on top of this to create an automated rig that will up your live playing to the level of the pros. It’s one of those things that takes a while to set up, but you will absolutely reap the benefits once you get your head around it.
![Array]](https://backingtracksfullcollection.com/wp-content/uploads/2026/05/1779850244_Array.svg.svg+xml "“He’s generous and super funny... he’s a good man”: So which rock frontman with a ‘difficult’ reputation could ex-GNR drummer Frank Ferrer be talking about? 41")